|
|
Post by Al Ramone on Jul 6, 2012 22:14:21 GMT 1
new year, new car :lol: laurel, meet cedric. your bigger, older brother. (not sure if it is bigger really?) 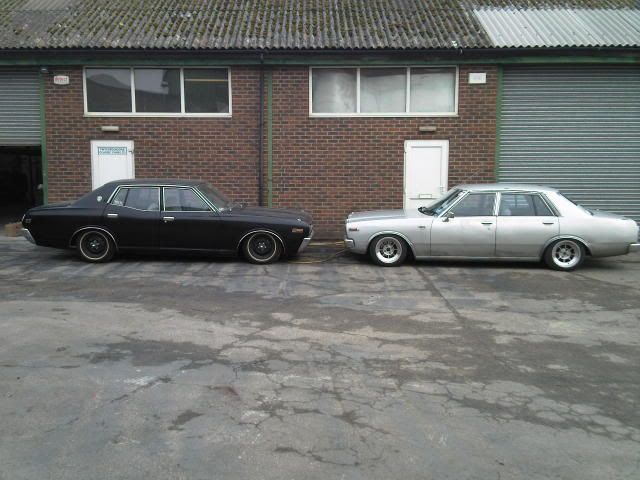  now go play  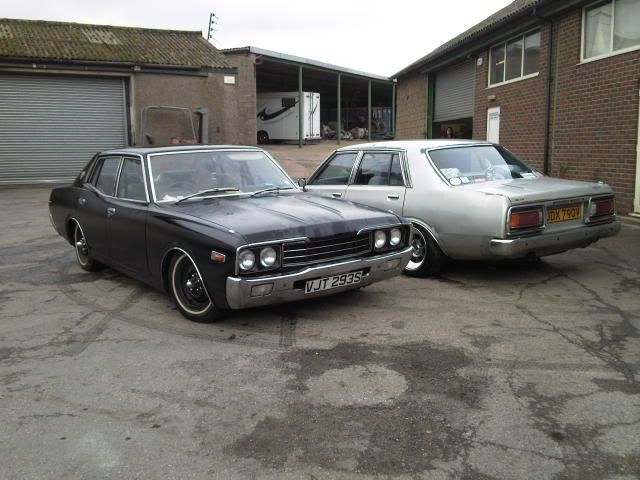 been getting on with this, sorting it out for the mot. plenty to keep me busy. got mot test booked for next weekend so sorting out the last few jobs. had to remove the gear shifter as there was no lock to hold it in gear. i've just made up a simple sprung loaded bolt for now. 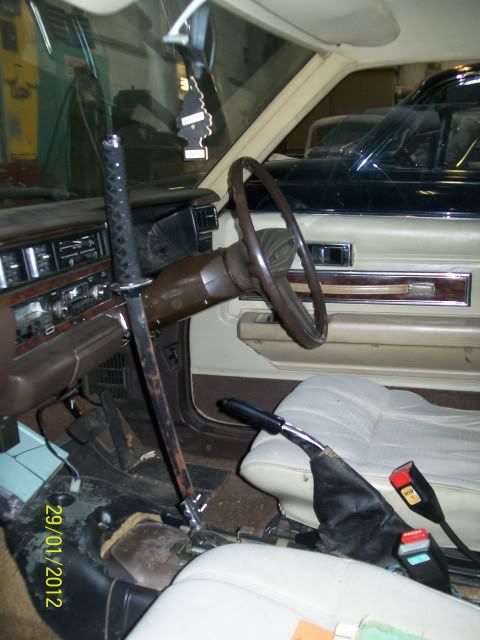 also i've refitted the door mirrors, by fitting riv nuts.  i've had to do some work on the exhaust as the old one was full of holes, this is just a temp one as i'll be making up a new one when the new engine goes in. got hold of a new center link pipe but also needed to replace the front section as the front box was knackered. rather then replace the lot i've just cut the box off and welded a new one on from my spares selection. 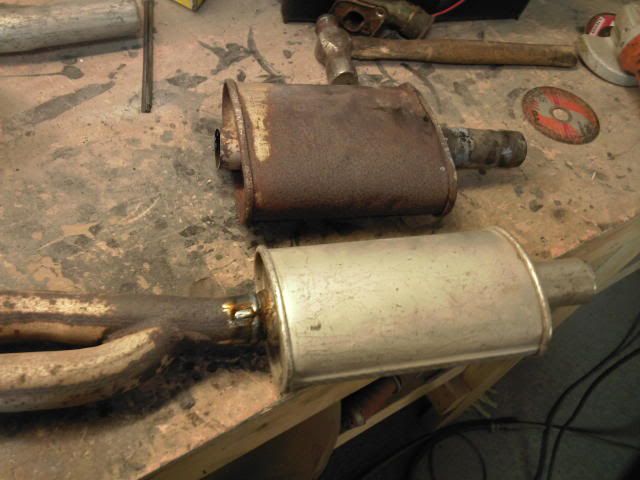 i've removed the lowering blocks from the rear, wasn't happy with the lack of location pegs. i will be lowering it back down once i've made up some proper blocks.  since that pic i've raised the front a little. :lol: not an mot job, but as the heater wasn't working right i thought i'd remove the dashboard and fix that. while it was out i got it all cleaned up 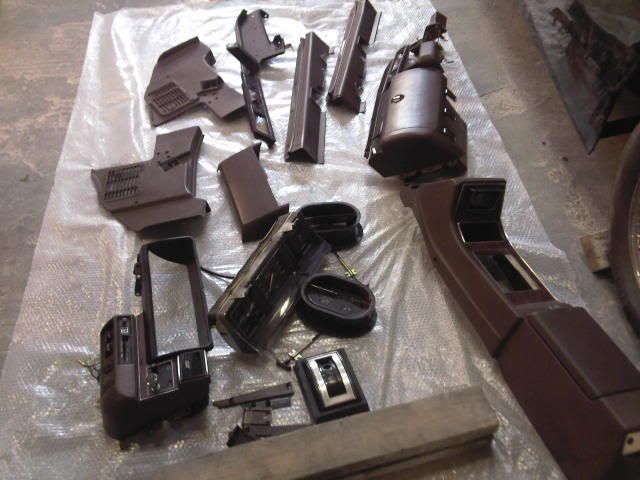 i need to get this mot'd and useable pretty quick as my other cars both need my attention... |
|
|
|
Post by Al Ramone on Jul 6, 2012 22:16:13 GMT 1
another busy day. finished off the exhaust, ended up replacing the rear box too, as it was a bit to noisey for me with the cherry bomb. 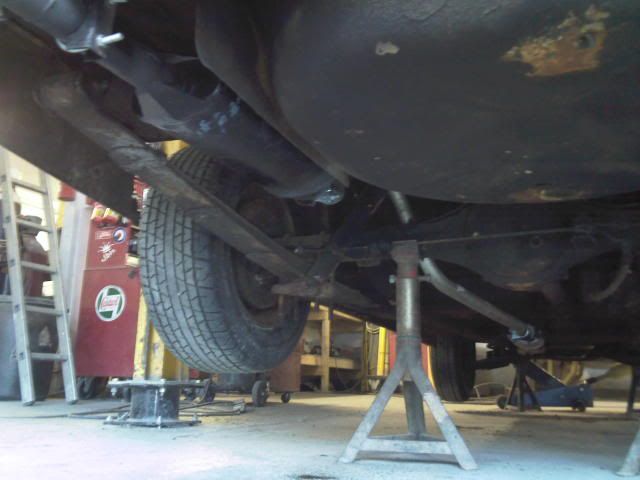 i'm amazed at how strong the shell is on these and along with the way the front suspension is designed and built i'm not surprized that these made such good banger cars. also can't belive how bad of a design the heater/bulkhead area is, as it's water drain just dumps the water through the A posts thou metal channels and once that has rusted away it fills up the sills :roll: dunno how there could be any of these left that haven't had the sills repaired this car is very solid underneath, but i need to get off the surface rust that is on the new sills and also some small aeras that need cleaning up. once i've done the important stuff i can get on with making it look pretty managed to get the car on the works ramp, so i've given the underside a good clean up and paint job. i bare metaled the sills as these had gone rusty as they hadn't been painted properly since being replaced. before 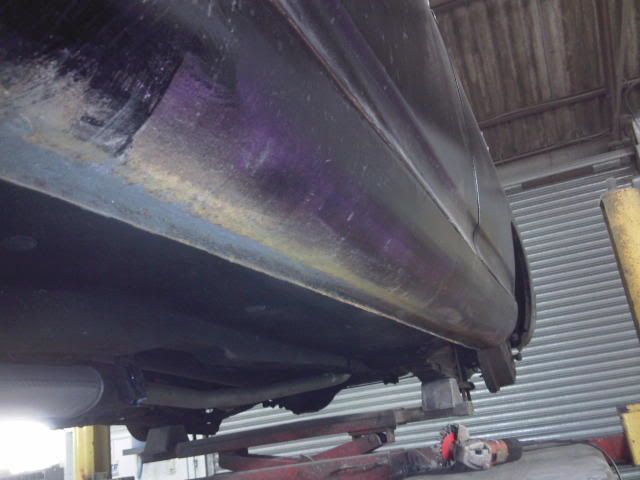 after cleaning them up with a sotchbrite pad on the grinder and then going over them with "metal restorer" solution. 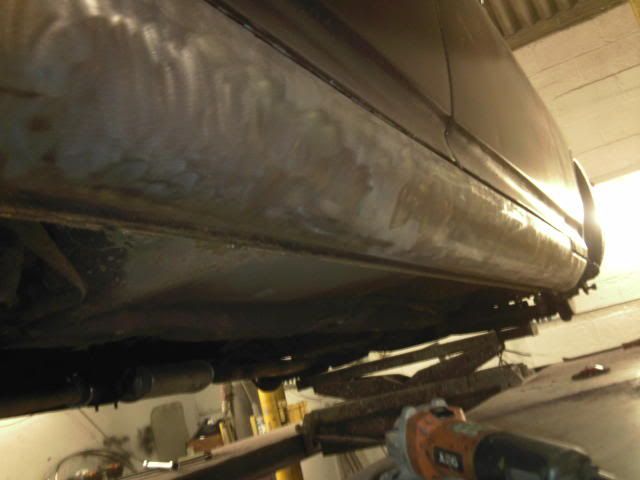 then primered. then given a temporay top coat just to seal it, as primer is pourous. i will sand this down and stone chip it before it gets painted it's final colour. 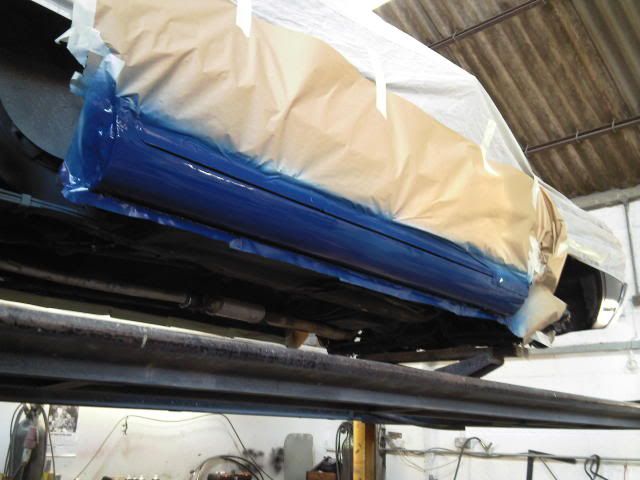 |
|
|
|
Post by Al Ramone on Jul 6, 2012 22:18:09 GMT 1
FAIL
didn't pass the MOT. failed on a few things
excessive wear in the front lower ball joint
all steering joint rubbers perished (new rules for 2011 mot)
excessive emissions. CO limit was 4.5 and mine was 6.5 and wouldn't go down with adjustment.
so. rather then try and get the engine emissons down i'm going to do my engine swap sooner rather then later :mrgreen:
my laurel's MOT runs out in march, and won't pass for a few reasons (one of which being my gaffa tape driveshaft gaitor :lol: ) so i need to get cedric conversion done by then.....
Will Datman. i'm sending you a parts request.....
|
|
|
|
Post by Al Ramone on Jul 6, 2012 22:19:48 GMT 1
pedal box converted to take a clutch and smaller brake pedal  no before shot. i used parts from a c210 manual pedal box, looks ok. i tried to work out where i wanted the pedals before i removed it from the car, i 'll find out if it's ok once it's all back together. modded the throttle from rod to cable 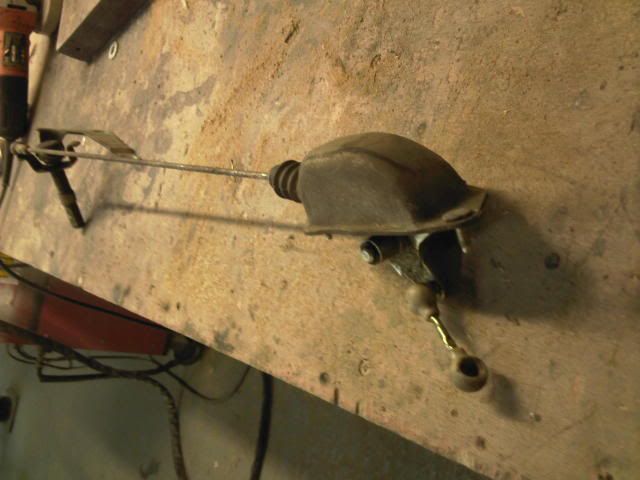 here's the fella, this sits on the bulkhead behind the throttle pedal and goes into the engine bay, with the rod linkage. 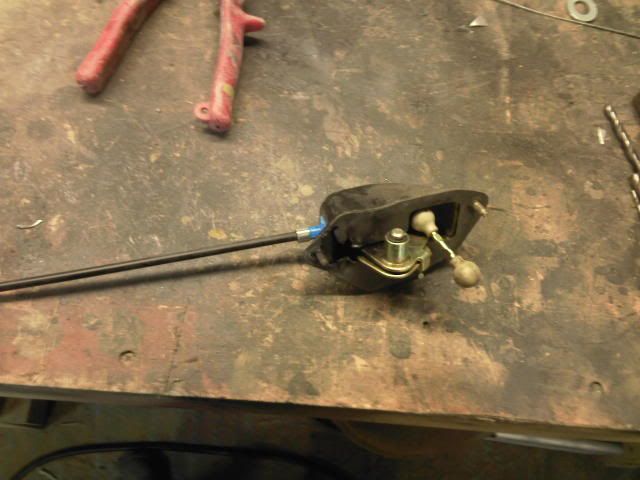 now has a cable where the rod linkage was, i need this to connect to my injection pump i've had to modify the right hand engine mount. the mounting holes on the diesel engine match the petrol lump, but because of the injection pump i can't use the stock mount. i've had to use the one that was on the diesel, and modify it to line up like the stock one 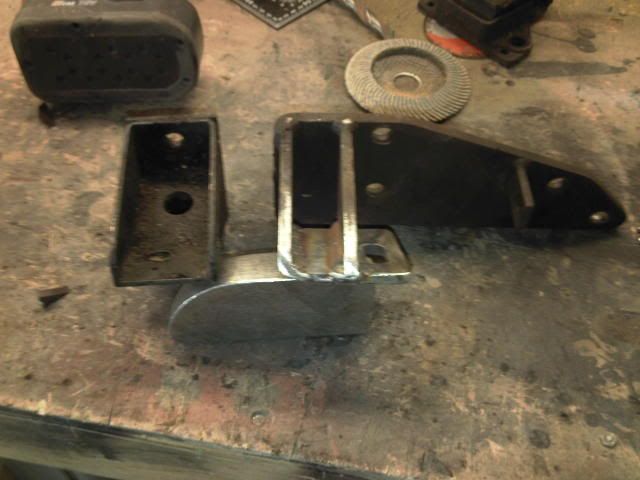 stock mount on the left, new, modded one on the right |
|
|
|
Post by Al Ramone on Jul 6, 2012 22:21:54 GMT 1
bolted in the new pedal box with clutch master and the throttle assembly, looks like thats gonna work nicely. i'm going to raise the height of the steering column by 10mm as the wheel seams to sit quite low. before i can fit the manual box i had to remove a plate where the shifter comes throu the floor, looks like datsun just added this bit on the auto's. i had to drill out a few spot welds and give it a tap with the hammer.  so that the car ready. moved onto the engine and box. engine came out of a converted land rover so had an adapter plate bolted onto it, whoever did the conversion didn't want the adapter to ever come off so had welded the bolts. had to cut thou the weld to get it off 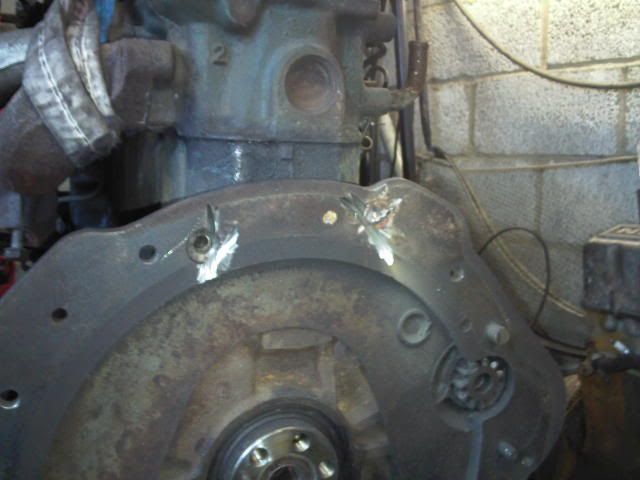 once that lot was off i refitted the sh t plate and flywheel, along with new clutch and spigot bearing. bolted up the manual box and it's looking like it's ready for fitting  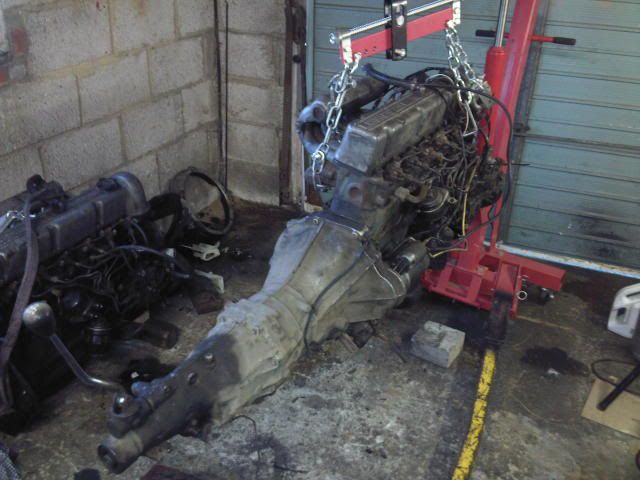 also been working out the wiring as i've gotta have a glow plug relay and do away with the auto's inhibiter switch. and as this engine has a later type alternator i'm able to do away with the separate voltage regulator. from what i've worked out all this should be fairly straight forward. got day off monday so going to get it all bolted in if all goes well. lets see if this fits  cool  all bolted up nice, had to adjust the sump a little but not to bad. exhaust fitted straight on, gearbox crossmember and propshaft both bolted up with no dramas. even the speedo cable went straight on. got the wiring worked out, nice and simple. so thought i'd better get it running. but no joy. the injection pump has sprung a leak. very hard to figure out what and where so i've pulled it off and will fit the injection pump off of my spares engine that i have had running. the offending piece 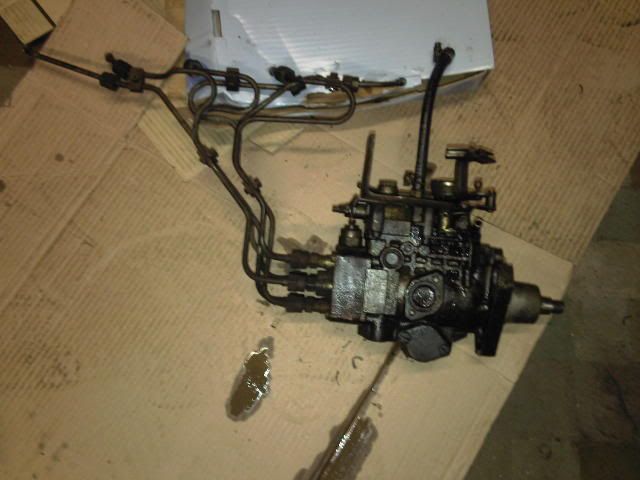 |
|
|
|
Post by Al Ramone on Jul 6, 2012 22:24:50 GMT 1
had a quick look at one of the pumps. removed the throttle lever to reveal the spindle. and think i can see where the leak is. from around this bush, there's some play in the spindle. 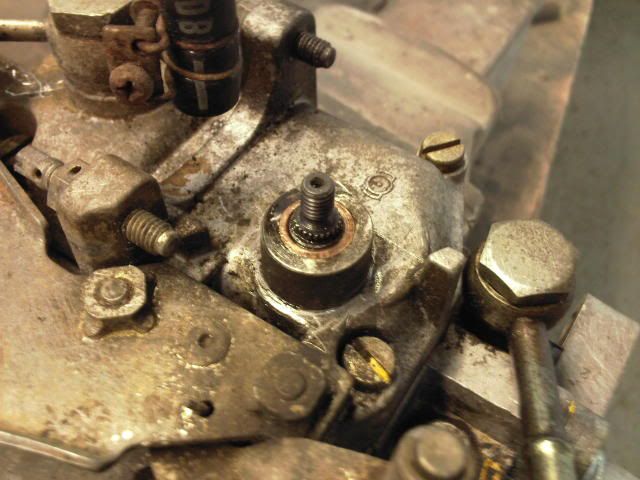 well the injector pump is off hopefully being fixed. while thats off i've been getting on with the other jobs. namely replacing the worn out lower ball joint with a new one. (thanks datman) and replacing the perished dust boots on the steering joints. I used polyurethane for these, they went on nicely and are supposed to be much harder wearing then the normal rubber boots. no pics of this, not very interesting. once i'd done the proper work I could get on with playing so I tackled the rear suspension. i'd previously removed the lowering blocks that had been fitted as I wasn't happy with the lack of axle location, plus it was a little lower then i'd like as I plan on dailying it. I figure i'll go for 50mm lowering for now and see how I get on. so this is how it looks at the axle. already have longer u bolts so thats cool. 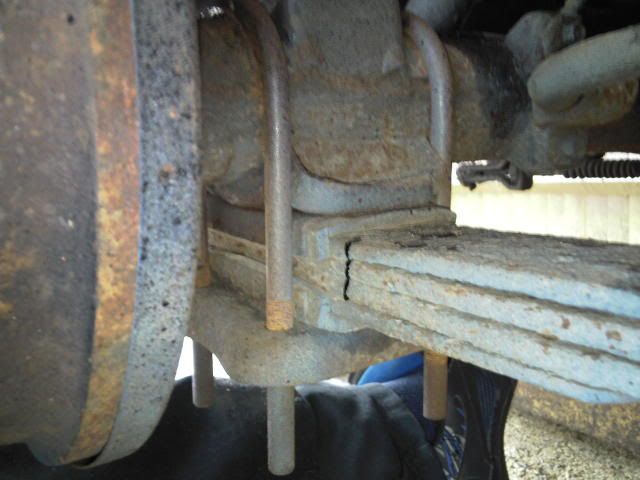 having the damper bolt to the lower bracket means I don't need shorter dampers 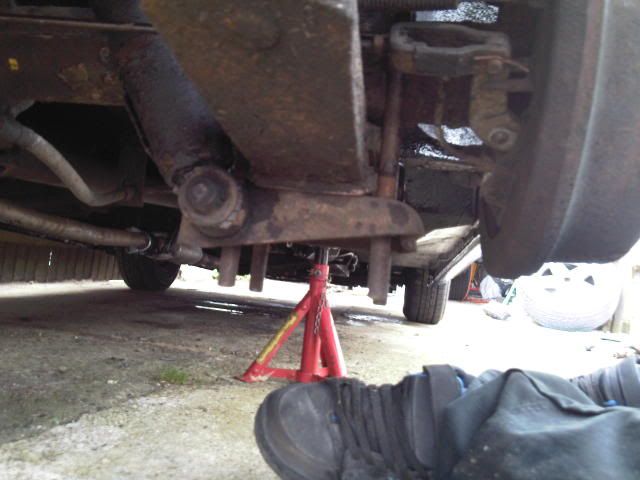 loosening the u bolts you can see the location peg and hole in the axle bracket. 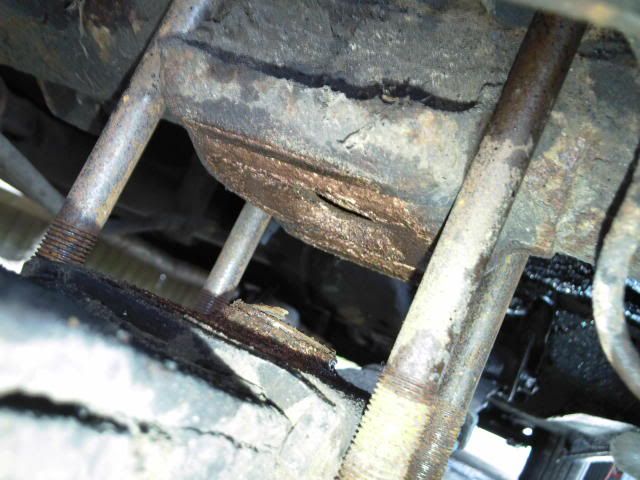 this car has a rubber isolator and metal plate above and below the spring pack 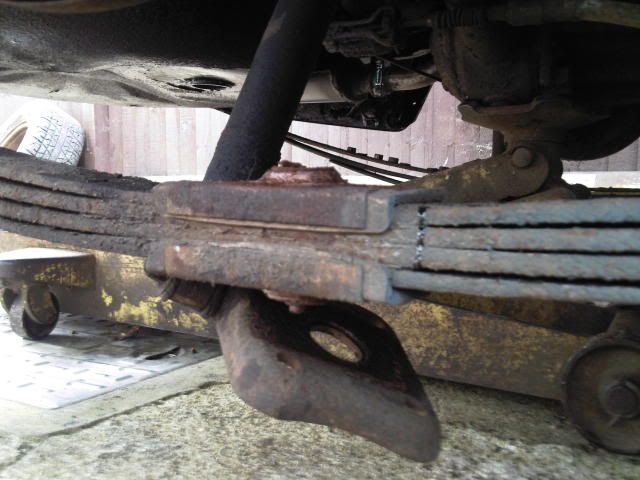 remove them and you got 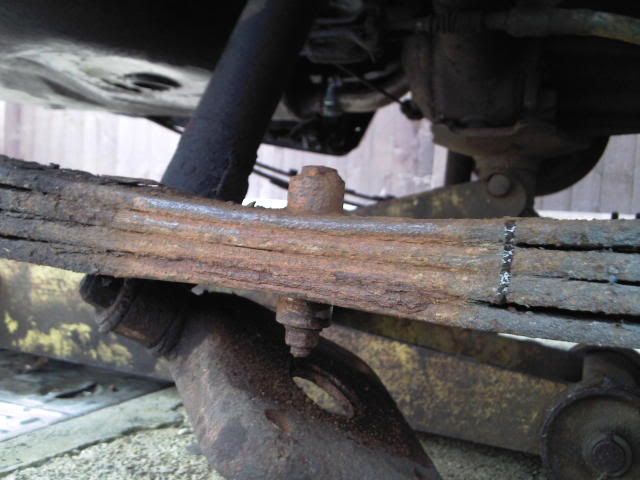 the locating pegs. i'm going to make a spacer to fit above the spring and under the top peg. 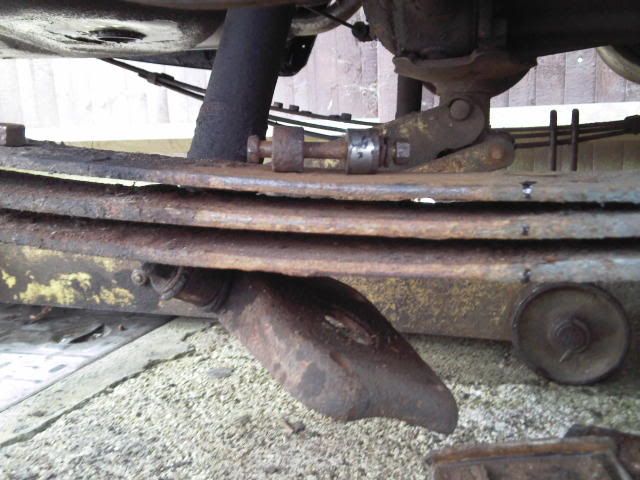 the spring leaves are bolted together and the pegs are held in place by the same bolt. you need to clamp the leaves together before removing the bolt. more updates once i've made the spacer |
|
|
|
Post by Al Ramone on Jul 6, 2012 22:27:02 GMT 1
time to make something here's how we start 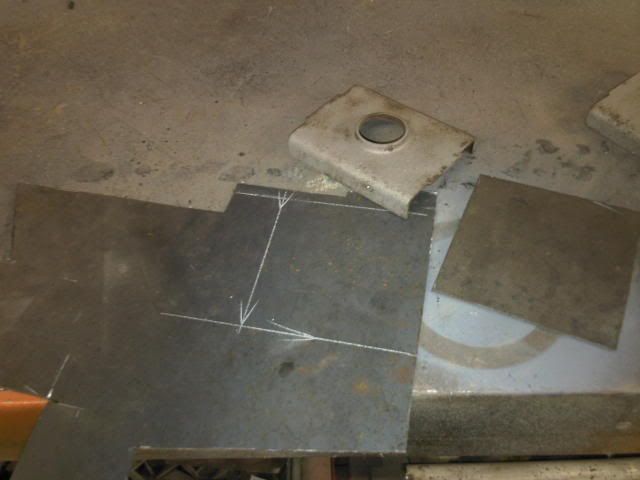 mark up and cut up a couple of bits of steel to turn into the lower half of my lowering blocks 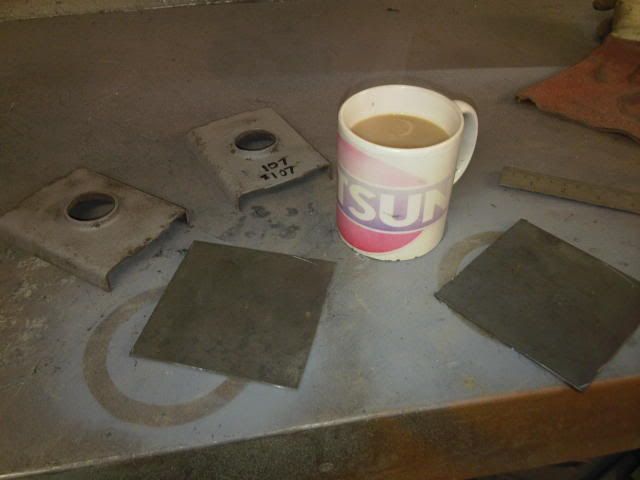 have a large cup of tea while I mark em up for folding and sort out some steel for the block. 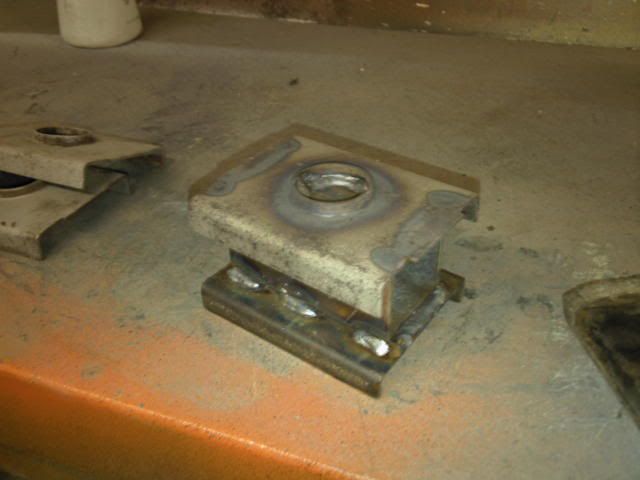 weld up the new lower section to the 50x50x3 box section and add the original plate above that. 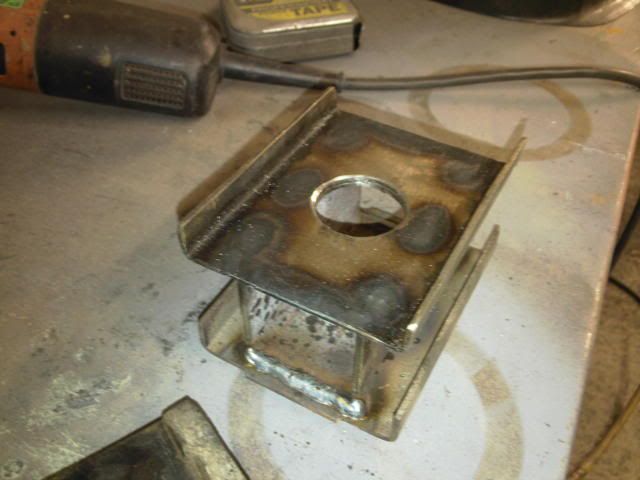 I drilled a hole out in the bottom of the spacer the same size as the original plate to locate it on the spring. 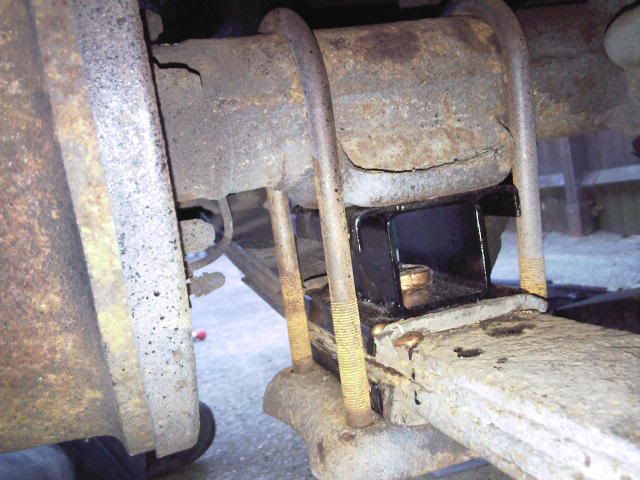 painted up and put in place. looks ok. you can see the u bolt is on the wonk in this pic. I need to check that, just needs seating proper. i'm happy that the axle is nicely located now. i've sorted out some alloys for this, just some cheapies for now. 7x15's with 205 55 tyres. also shows my how 15's look on the car. with the ride hight I have I could deff go much bigger. we'll see. might end up lowering it a bit more yet..... |
|
|
|
Post by Al Ramone on Jul 6, 2012 22:28:02 GMT 1
cedric went for it's MOT today and very happy to say it passed this time around  now i can get on with the rest of the jobs..... first thing i need to address is the noise, it's pretty rattley. doesn't help that i've got most of the carpet missing and the dash is bolted up proper. i'm gonna get a load of under carpet sound deadening and use as much as i can on the bulkhead and front floors. and possibly change the carpet itself for something thicker and more plush. my 1979 240l has nicer carpet then the 280c, which doesn't make sence :? i've also gotta set up the injector pump. it's been rebuilt and is now leak free (powerdrive in portsmouth fixed it. good guys) i've set it up on the stock timing marks but havn't set it up with a DTI gauge, like your surposed to. so it's not right. also might screw the smoke screw up a bit as there's no black smoke. plenty of other little jobs to do, not least of which is the paint. but for now here's a pic of how it currently sits, with it's new budget wheels. 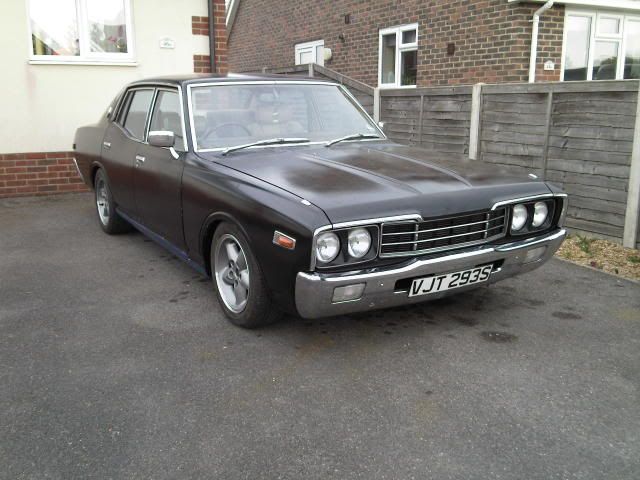 been using this and it's going ok so far. few niggles. it really needs taller gearing, a higher ratio diff would be nice. i'm unsure what is in there currently, from reading the nissan manual, it could be a 4.1 or there were options of 4.4 and 3.9. from what i've heard a diff from a 300c estate is 3.7 so that would be better. also could do with different ratios in the gearbox, the gap between 4th and 5th is quite close. a gearbox from a '81 onward 280zx would be good as these have a taller 5th. the other problem i have was the rear tyres rubbing on the arches. thats now fixed. i started out using my arch roller, which folded folded it up a fair bit. but i've never found these to be that great and don't give an even fold and nice shape, so i always end up getting out the hammer n dolly to do it nicely. 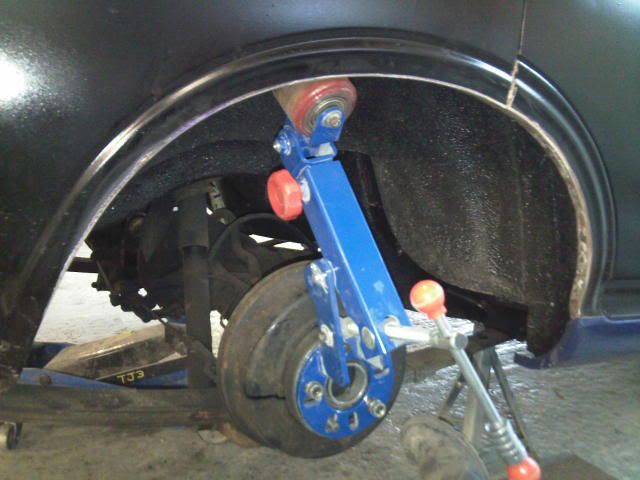 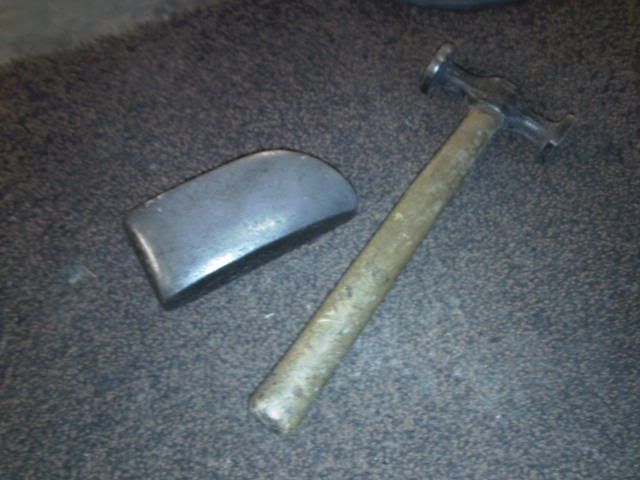 folded up flat, so as much clearance as i can get and means the wheel/tyre can come out as far as poss 8) 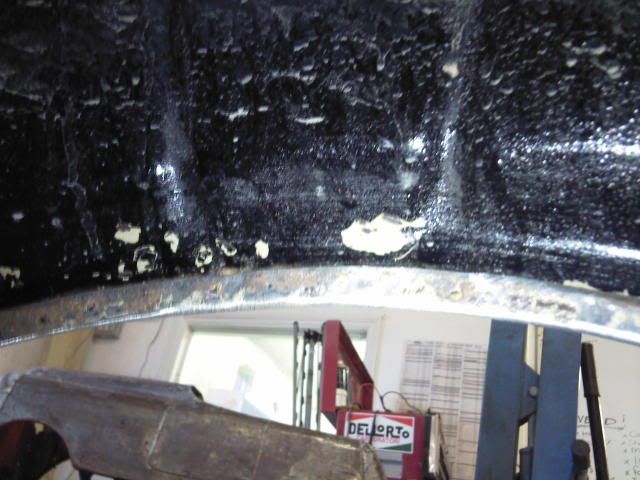 i use a sealent to stop water/dirt getting between the folded up lip, don't want it rusting. 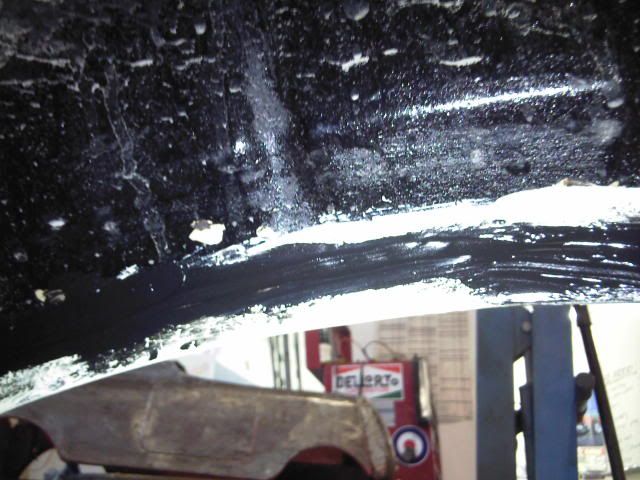 and then i'll give it a good coat of chassis black. done. sorry for the rubbish pics. also fitted an exhaust gas temp gauge, these are used to help tune diesel engines. something i've not done before so looking forward to learning something. no pics, but i'll see if i can remember to take one. |
|
|
|
Post by Al Ramone on Jul 6, 2012 22:29:15 GMT 1
i've finaly got around to sorting out something the was really bugging me. the rear bumper on this, even thou it's got great chrome and no real rust, it is rather bent. and looks unloved :oops: it'll be very hard to find a good bumper and lots of money to have this one stripped and re chromed, plus the time to straighten it out. far better to work with what i've got and not make it any worse. so, popped it off after work to see if i could improve it. 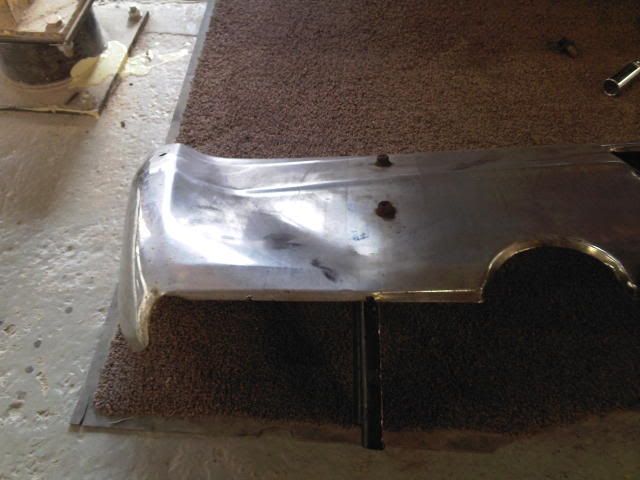 pretty nasty dent, it's buckled, streached and torn at the top edge. but the chromes still good. even thou the bumpers are made of pretty thin tin and rusts fairly quickly, the good thing about that is it's fairly easy to  em about. so, i gave it a few wacks with a few of my hammers. as i don't want to crack the chrome i used a big rubber mallet and also a smaller hammer which i put couple layers of masking tape on. i end up with this 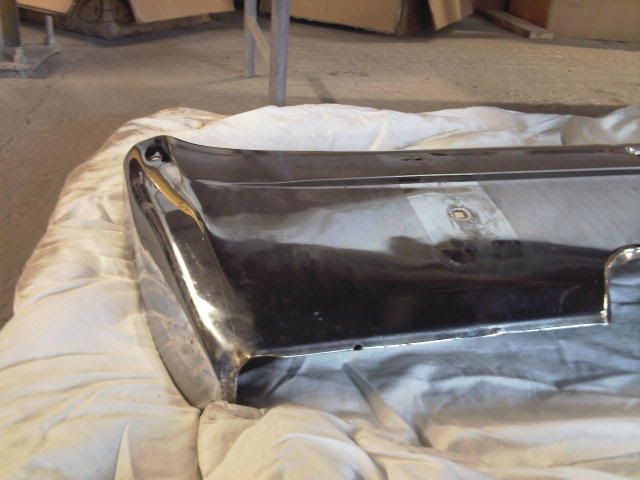 not perfect, but without risking damage to the chrome its as far as i want to go. next step was to clean up the surface rust on the backside. if i can stop or at least slow down the rust there, it should last a bit longer. quick wire brush and then a couple coats of chassis black   back together 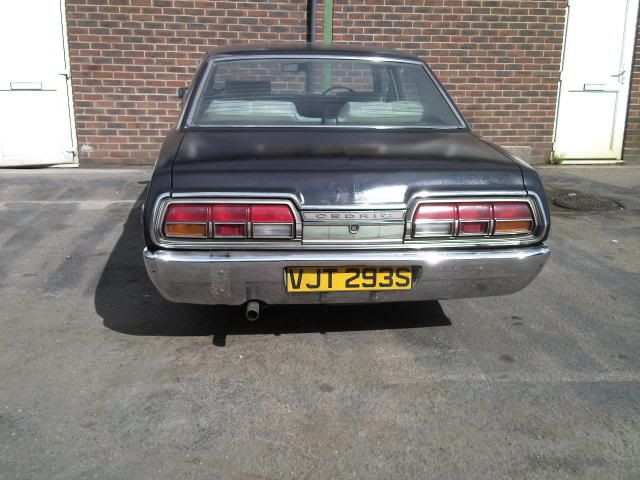 looking a fair bit better. i've had to do some mods to the front suspension. where it had had the front springs cut and also now has a slightly heavier engine up front (cast iron head) well the suspensions bottoms out on anything but flat smooth roads and no corners. and thats steel on steel no bumpstops :shock: not the best. well, as i couldn't weld back on the bits that had been cut off the springs, or find uncut ones i've had to fix it another way. i've brought some spring assister rubbers. these are ment for fitting to the rear springs of cars that tow or carry heavy loads and are sagging. they go inbetween the coils and stop them from compressing, in doing so they will raise and uprate the suspension. so thats what i've fitted to the front. they've made a big difference, still need to sort out bump stops though, i'll have a hunt for some universial ones. and the big update i've started 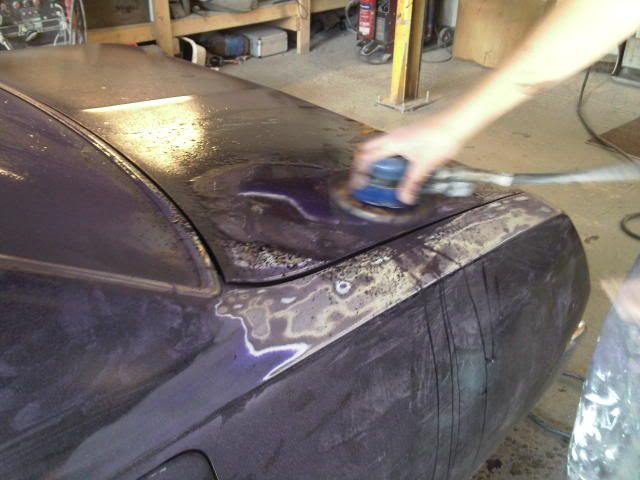 this is gonna be a long, hard job. all the black and the purple underneath needs to come off. it's already flaking off in parts and covered in crazings. trouble with it is the paints so crap it's clogging up the sanding discs quickly. even tried out using water to stop the clogging. and i'm using 80 grit and 40 grit :shock: i've been stripping the car down quite far. all door rubbers, door trim, handles and chrome are off. bumpers, lights, badges, everything that i can get off is coming off. i'm a bit stuck on the chrome on the door glass surounds. i can't figure out how they come off? |
|
|
|
Post by Al Ramone on Jul 6, 2012 22:31:26 GMT 1
ok grabbed a few hours at work today with the paint stripper. much easier going then the sanding discs and less risk of damage to the panels from heat build up or pressing to hard and warping them. i'll still have to sand off the last bits but this is going to be much easier now. 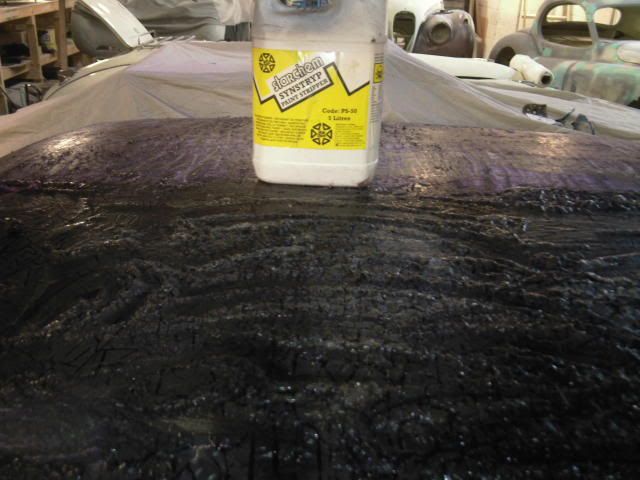 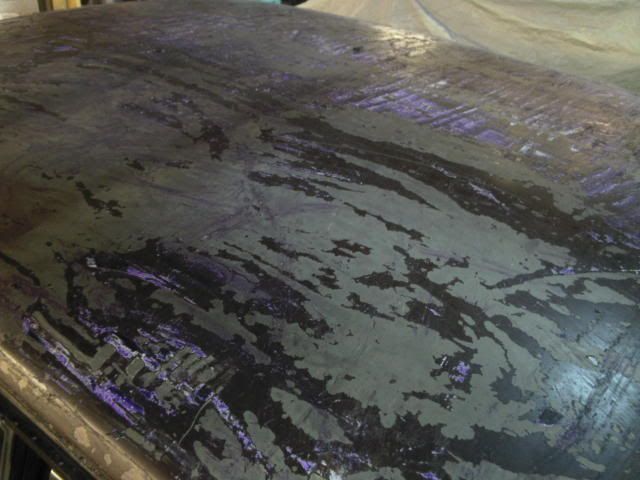  the original nissan paint is very thin. that, plus the thinness of the steel means it's unsurprizing that these old japanese cars didn't last that well in this country.... we had a go at sanding down the rest of the paint, just using 40 grit in the DA to get the thicker bits off then onto 80 grit all over. much easier going now the black's off. result. and my painter is much happier with me :oops: 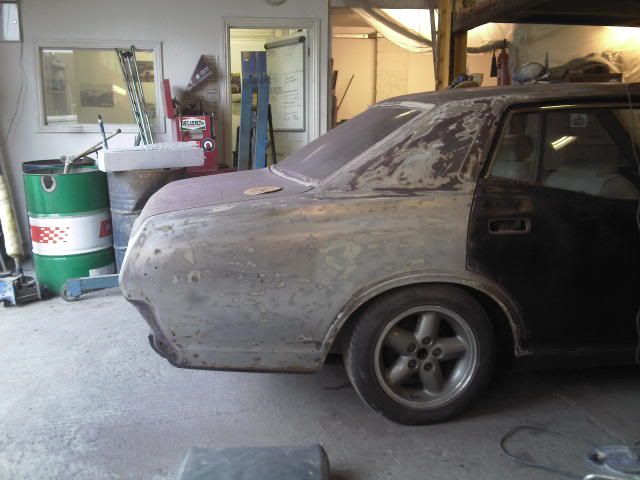  pretty much all off now. just doing the roof, boot and rear quarters first and getting them in primer before moving onto the other panels. 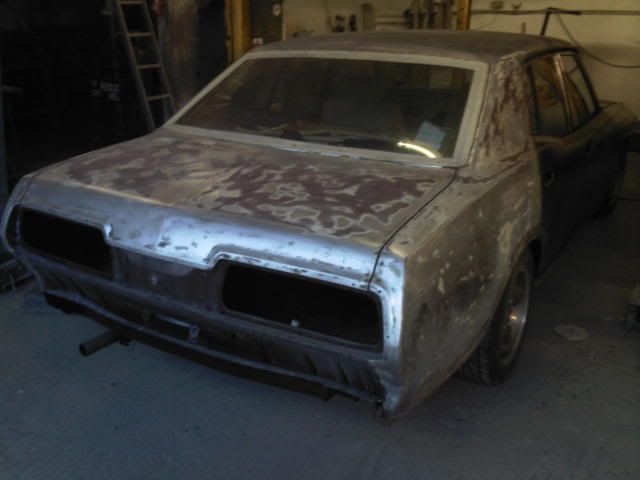 I've decided I'm going to do away with some more of the badges on this to show off the shape of the body. also going to do away with some of the trim around the side windows. I'm losing all the badges from the rear quarters, the badge on the C post and also going to do away with the lock on the fuel filler flap. 16 hours in and we have this 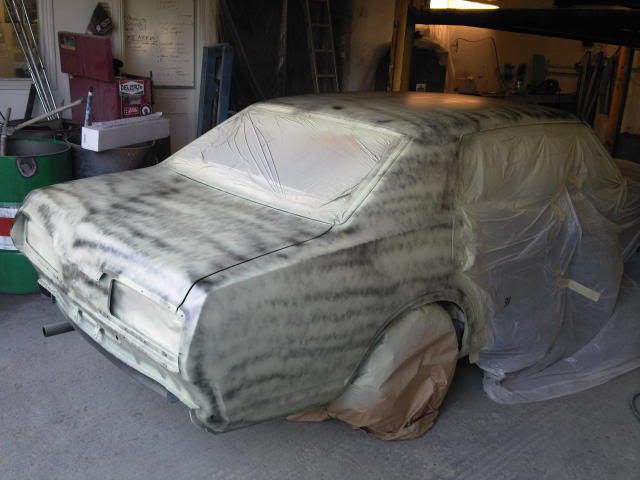 i need a rest..... |
|
|
|
Post by Al Ramone on Jul 6, 2012 22:32:37 GMT 1
23hrs in..... we've got all doors stripped and have also done the front wings. we'll still need to go over them again and treat them with metal restorer to get off any surface rust that will get on the bare metal. got a dent in the lefthand rear door to fix and a couple on the front edges of the front wings. oh and and the rear quaters where the badge holes have been welded up will need a skim too. got a little bit of welding to do on the front wheel arches, thankfully thats the only bit i've gotta do. let me show you my door bottoms 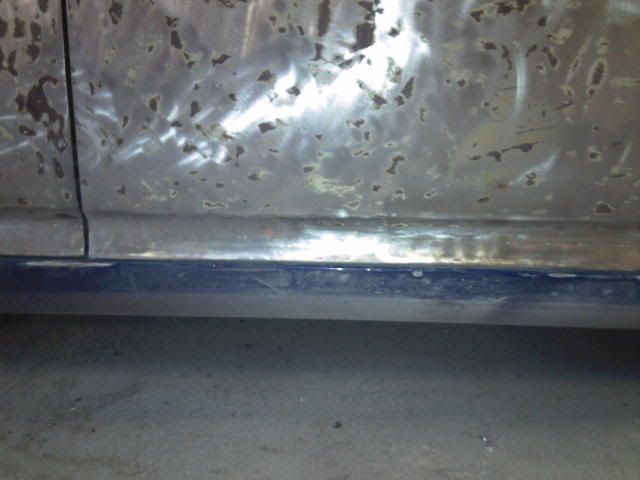 |
|
|
|
Post by Al Ramone on Jul 6, 2012 22:33:24 GMT 1
anyways. been on it again today. had the bonnet to strip so tried out putting a sheet over the paint stripper as this is surposed to work better as it keeps the fumes in. 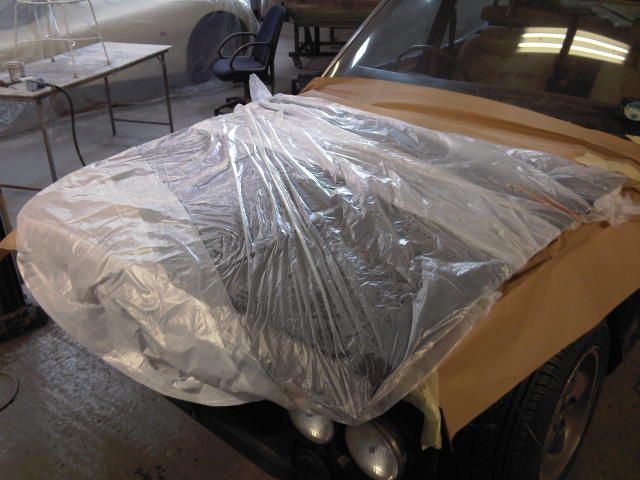 still had to give it a couple of goes but it does seam to work slightly better 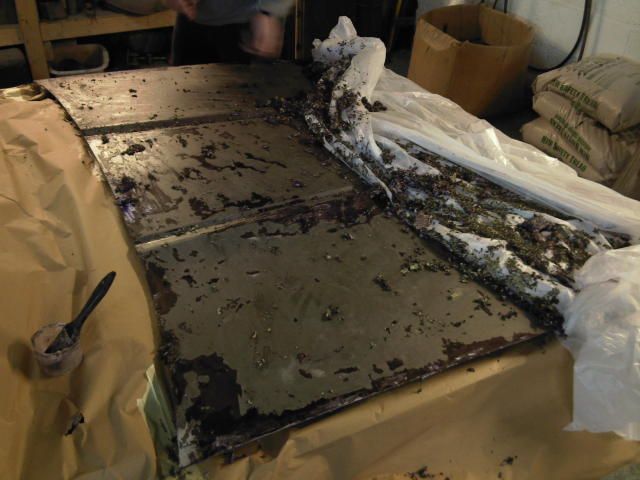 also removed the chrome trim from around the door windows and striped the paint off there. that was time consuming but gotta be done. also done some rust treatment, including a small hole i found in the A post next to the windscreen. no real dramas. 29 hours in..... hopefully get it all in primer next week. but there's still the filler work to do...... |
|
|
|
Post by Al Ramone on Jul 6, 2012 22:33:54 GMT 1
hit it hard over the last couple of days... 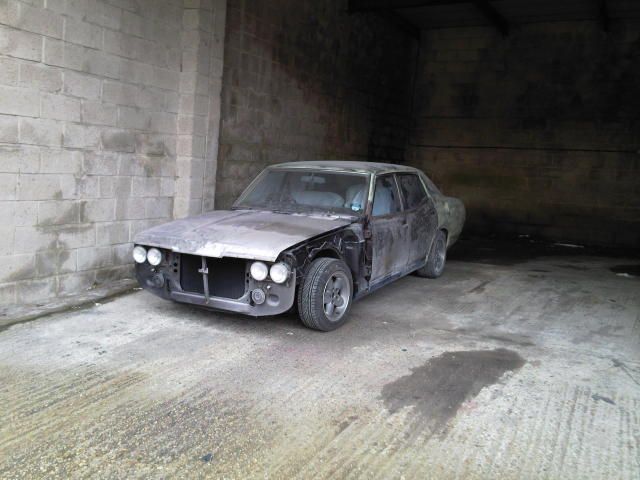 started off monday after work and got the doors sanded, treated and in primer. 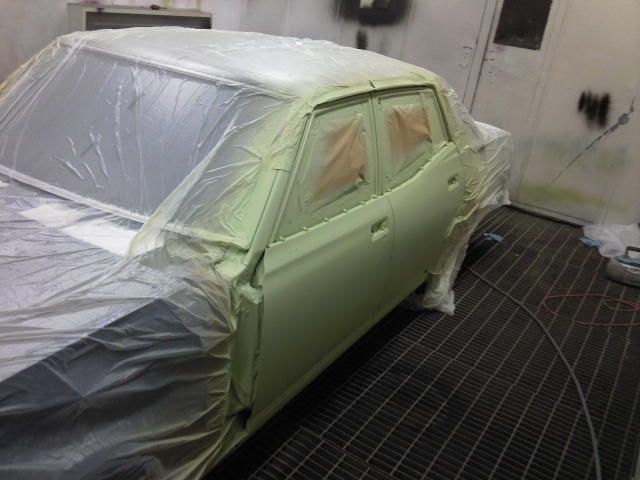 and tonight we got the bonnet, scuttle and front wings sanded, treated and primed. 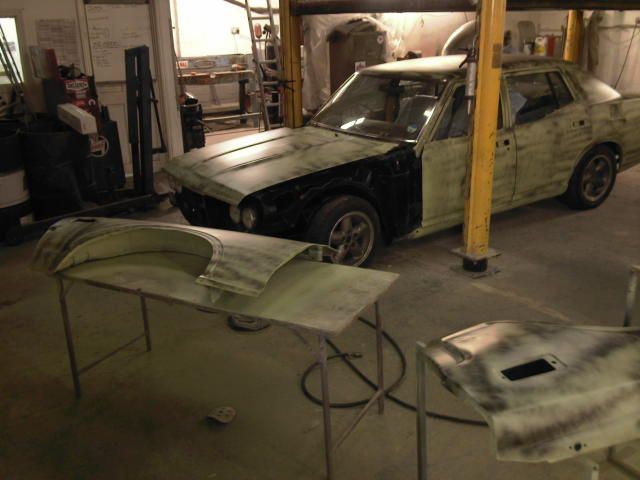 so now all in primer and ready to get on with the filling. 42 hours in i think. i'm a little tired.... |
|
|
|
Post by Al Ramone on Jul 6, 2012 22:34:45 GMT 1
decided to get on with something other then paint/bodywork today as there's only so much rubbing i can do without going mad. currently stands at 50 hours..... soooo as i'm gonna be running pretty low and also using fairly deep dish alloys. 7x15 et -10 with 185 65 tyres. as well as folding the arch lips flat i've gotta add some camber to the front suspension to gain a little bit more clearance. the front suspension on these, unlike most other Datsuns of this age, is double wishbone. helpfully, Nissan have made adjusting the camber, and caster for that matter, very easy. 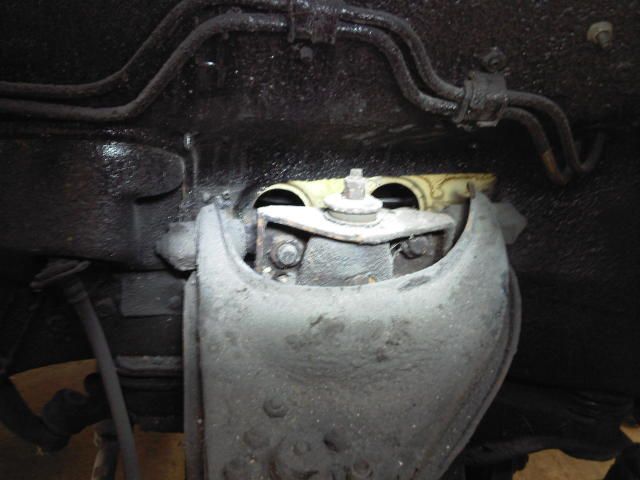 here's a shot of the upper wishbone. the pivot point is bolted to the crossmember and has shims that go between the two, to vary how far in or out the upper arm sits. 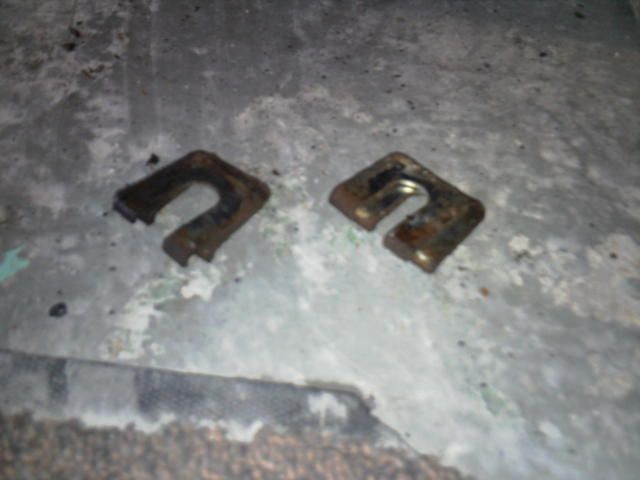 shims. so, nice n easy, and loads of adjustment. the more shims, the more camber. as i haven't got any proper Nissan shims i've made some up quick so i can try it out and see how much i need. they're 6mm so i think that should be 1.5 degrees. 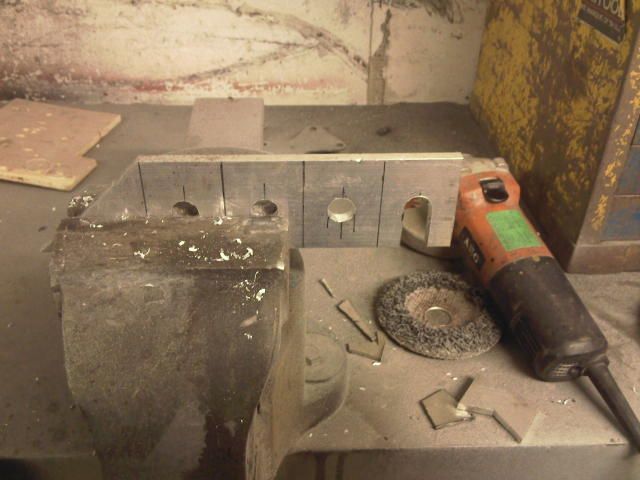 and fitted 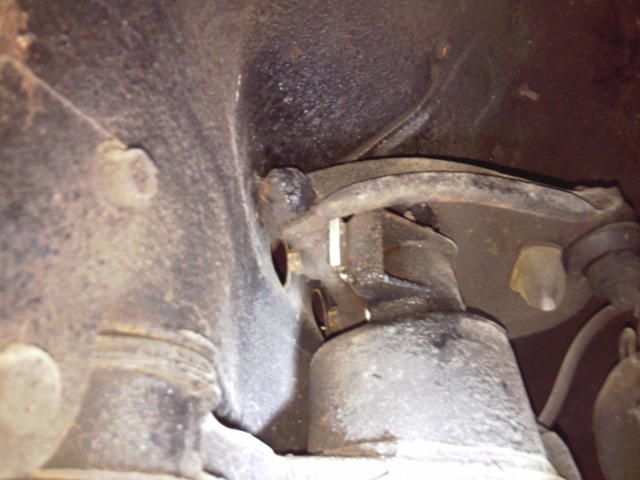 so far that seams like it will be about right. once im sure it's enough i'll make up some more perminant ones and have the proper ones to give me any adjustment. back to the rubbing down.... |
|
|
|
Post by Al Ramone on Jul 6, 2012 22:35:50 GMT 1
got all the filler work done, was a lot more to do then i first thought. mainly on both rear doors which were both bashed in. little bit of hammer action and all it then needed was a skim a filler. plently of long blocking later and then reprimered and set to with the stopper.  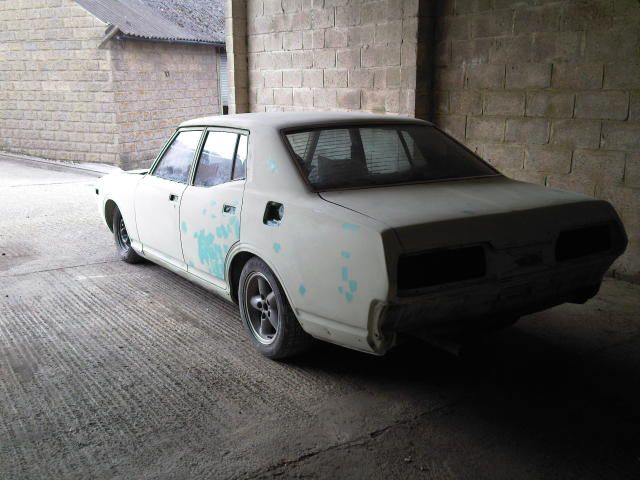 and then. 75 hrs from when i started removing the old paint, it's finaly ready to get in the oven and start masking up for top coat. 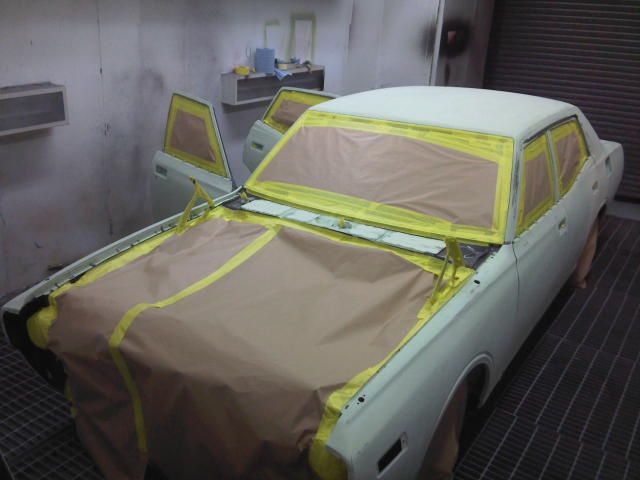 so this is how it currently looks. not finished the masking yet thou... masking is taking a long time due to the fact we're painting all the door shuts and inside doors but i haven't removed the glass or a lot of the interior. aiming to get it painted friday after work. |
|


